Thursday, 27 August 2015

August Beauty Favourites


We've made it to the end of another month, cue my first ever Beauty Favourites blog post *party poppers goes off in the background* Wow, I can't believe that the next time I post about my favourites, it will be from university! Eek! 

Anyways, here are my seven favourite beauty products from August, like Meghan Trainor (eww), I've been all about the base this month! Five of my seven products are for my base and I have to say, I've been finding products that have boosted my base game a whole lot. 


Rimmel London Stay Matte Primer

I surprised myself with this one, having really dry skin, I tend to stay away from any products that will make me even dryer. However, I love a matte base so I've been experimenting and I don't know whether it's my moisturiser, primer, or foundation, or a mix of all three but my skin hasn't been flaking and cracking like it usually does when I apply makeup. 

Either way, this primer has been a good friend to me and my face this month. The formula is white and just a little thicker than my Simple Moisturiser, it is aqua based and will therefore work well with the majority of moisturisers. 


It promises to control shine for up to eight hours, I would definitely say that I am left with a very matte base when I use this primer but whether it can last up to eight hours I don't know. It also claims to minimise the appearance of pores and I would agree that it does minimise them a little but not really enough for me which is why I use this product after applying my Maybelline Baby Skin Primer which helps cover my pores more. 

For those of you with oily skin, I would definitely recommend this for keeping your oils at bay and, although I can only testify for myself, this doesn't affect my dry skin so if you have dry skin and love matte skin, I would say give this primer a go!


B. Flawless Complete Coverage Foundation


I have never really been able to achieve a flawless base before, I have blemishes and redness for days! So when I saw that this complete coverage foundation from B. was on sale at Superdrug I had to go for it. 

I have a massive fear of products going cakey on my face and just bringing more attention to my problem areas and peach fuzz so I was pretty apprehensive about using this foundation. 


The formula is super thick and doesn't run, this usually puts me off because I feel more comfortable with more watery foundations so I do use this with other foundations. But as it warms to your body heat, it is much easier to blend in which I love and find it easy to press this foundation into my skin with a sponge. 


As a side note, for the past couple weeks, I've been mixing two foundation together, usually this one and another (Loreal True Match, Bourjois Healthy Mix Foundation and Healthy Mix Serum) and applying with a Real Techniques Sponge and this seems to give me the most flawless base. I have no idea why but mixing foundations always gives me a better result!  
Also, when I use my sponge, I will firstly mix the product on the back of my hand, wipe on the main parts of my face, then I'll use Elf's Stipple Brush to spread the product evenly around my face before going in with the makeup sponge. 

This foundation doesn't have a problem with my dry skin, but does bring out the texture between my eyebrows (which every foundation does with me, it's just my curse, I think). So this is perfect, the coverage is good but it wouldn't match up to higher end foundations, of course. I don't think it's the best drugstore foundation out there, I still prefer Loreals True Match, but this is a very good foundation and if you're looking for a new foundation, you should give this a go because I've been loving it! My face has never looked at flawless as it has since I started adding this to my routine. 


Bourjois Aqua Blush 

Yay, cream blushes!!! I love these guys, my all time favourite is still Rimmel London's Stay Blushed! Blushes, but give me any liquid blush and I will fall in love with it!

The shade I have here is Berry Nice, it's a super bright pink which is perfect for getting the most out of the summer before it leaves us (of course, you can wear whatever blush you like in any season, but I prefer deep, darker cheeks in autumn). 


The thing I love most about this blush is that it is a liquid, adding loads of powders onto my dry skin is never a good idea so I use as many liquid products as I can to achieve a more natural and none-drying base. 


On the bottle, it says that one pump is enough for one application and that this blush is 'sheer' but I would have to disagree. This aqua blush is so pigmented and bright that I can get away with half a pump for both cheeks. The good news is that it blends like a dream so it's easy to rub this all over your cheeks to sheer it out a bit.


I love the packaging, the pump is perfect and much better than the plastic tube that the Rimmel blush comes in. One of Bourjois' strengths is that they know how to design their products so we want to buy them, look how cute this little dude is, I'd buy them all just for the look of them if I could! I would love to try out the darker shades in this line because I love the formula. 


Maybelline Master Sculpt 


Lately, I've been carving my cheekbones out more and more and my helpful companion on this journey of chiselled cheeks is the Master Sculpt Contour and Highlighting powders from Maybelline. 
Even though I have pale skin, I got the medium/dark shade because the contour shade was a cooler brown and would therefore work more efficiently at carving out my cheekbones. 


The container opens up to a circular pan with the contour powder and some highlight powder too, I love using both of these for a natural looking contour. The highlight is perfect for adding a soft glow to the high points of your face without making it overly obvious that you've put highlighter on. All I would say  is that is can look a little powdery and chunky if you apply to much, so make sure to be careful with this. 

This lifts up to show a mirror and flat brush, perfect for carving out your cheekbones, it is pretty long so it's easy to apply an even layer of powder to your cheek and it's thick enough so that you can control where the powder goes but also so you can blend it upwards easily to give a more natural look. I love this brush to bits and use it for my contour all the time! 

For a cheap chiselled look, this product is spot on! 


Maybelline Brow Satin

I had been wanting a brow pencil for a long time before I got this product, but what drew me to this Brow Satin specifically is the filling powder side of it. I feel like this is already a popular brow product as it took about two months for my shade, medium brown, to be in stock! 


This pencil is double sided, one said has a thin pencil and the other has a sponge tip that applies a powder that helps to easily and naturally fill any gaps in your eyebrows. The pencil is perfect for giving your brows shape and defining any areas that you want to sharpen up. This is also the perfect size to draw or fall in the tail of your eyebrow.


The sponge tip side is much bigger and therefore much harder to use on the thinner parts of your brow, but I use this to lightly fill in any sparse areas. I also love to use this side to sharpen up the inner part of my brow because the powder is so much softer and leaves my brows looking more natural. 


I will always go in with a spooly afterwards to soften the lines left from the pencil side and I will also use Maybelline's Brow Drama to keep my brows in place all day! 


Geek Chic Cosmetics Eyeshadow in Very Specific Skill Set 

For those of you who, like me, get way too into fictional worlds like Harry Potter, Lord of the Rings and Avengers and also have an undying passion for makeup, you will love Geek Chic Cosmetics. They're a small makeup company based in America who create amazing eyeshadows and lip products based on the geek world! My favourite so far has to be this eyeshadow, not only is the most gorgeous burgundy eyeshadow I've ever seen but it is also inspired by one of my all-time favourite characters: Black Widow!!! My friend actually bought this for my birthday not knowing I had long been searching for an eyeshadow this exact colour so kudos to her. 


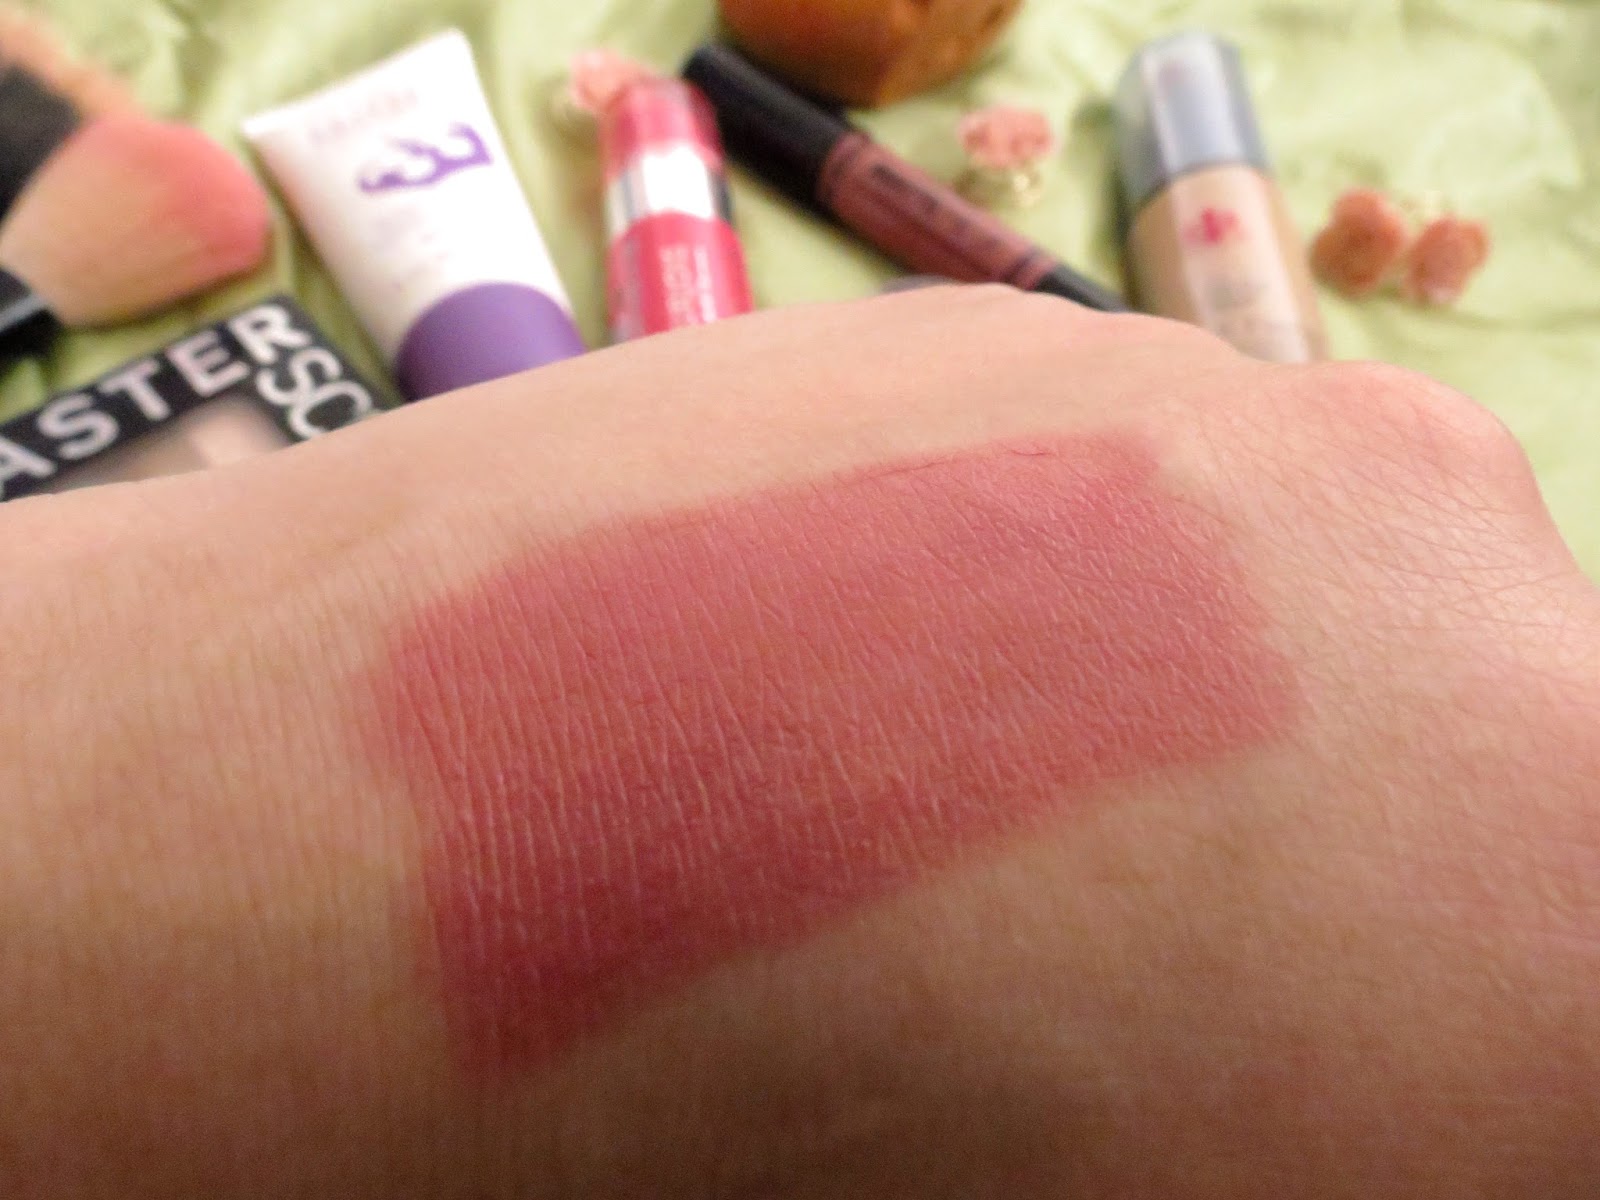
Look at it! It looks pretty brown in the pan but when swatched it becomes a beautiful shade of red. 

It is a super blendable formula and looks amazing in the crease, it can get crazy intense pretty quickly though so I use the tiniest amount, like I hardly let the brush touch the product because it is so heavily pigmented. 


When I swatched it, I made sure to press to product into my hand and then blend out towards the camera. This shows you that when using a lot of product and applying with pressure, that brown remains and you can get a really decent deep brown by packing this on. But as it blends out, it gets lighter and redder. 

I know that this kind of colour is a dangerous one because it can easily look like you are ill but as I said, if you're careful it can look absolutely beautiful! 


Barry M Matte Me Up 

I've never had much faith in Barry M lip products but when I saw this I had to try it and I was so impressed!
I would say that it isn't amazingly matte, it's nothing like a liquid lipstick that dries matte but it offers an alternative. With this lip crayon, you get the softness of a lip butter but with the pigmentation and look of a matte lipstick. I have a bit of a love/hate relationship but I'm glad I bought it and I clearly love it enough for it to be in my favourites! 


It feels very moisturising and comfortable on my lips and the colour (I have number 3) is beautiful! If you like brown toned pinks then you will love this colour. I have been wearing this so much since I bought it and I have to share with you guys because it is such a great product, especially for it's drugstore price.


It is super soft and subtle colour that can easily fit in with your face. I think this would look beautiful on many skin colours but as I'm getting paler this colour is seeming more bright and contrasting on my face, so just keep that in mind.

I'm not sure it lasts as long as I would like but I don't have many lip products that last the whole day anyway so this isn't too much of an issue for me personally. 

A problem I have with this product is how easily is can be blended or wiped away, this is a side effect of the soft formula and is why it is so comfortable to wear but I am constantly licking my lips and talking and eating so this type of product doesn't really stand much of a chance. Still, I love the colour and feel of it and wear it often!


Well, that's it, they're my favourites of this month, I hope this gave you some idea of what products you could try out. What products have you been loving this month? Let me know in the comments! 

I will see you next week, where I will be reviewing the Rimmel London Wake Me Up range (foundation, concealer and mascara)!

Wednesday, 19 August 2015

Disney Princess Inspired Makeup Looks

I delved deep into my makeup collection and created four looks that take inspiration from some of my most beloved Disney Princesses: Belle, Rapunzel, Tiana and Ariel. 
I hope that this will be part of a series where I create makeup looks based on different franchises so if you have any recommendations, bring 'em my way!

Disclaimer: Arrghhh, I'm still terrible at capturing my makeup on camera so these looks are no way near as beautiful and vibrant in the following images as they are in real life, so please recreate these to see how utterly gorgeous they are!!! 

Oh and I've got some really recommendable products up in these looks, I'm still excited about some of these even if I bought them months ago! If you see (!) it means I got some super love for that product.

Right, let's get into this!

Belle
Dang, Belle draws for first place as my favourite Princess of all time, but I was struck by her yellow dress, which is obviously a signature feature of her design. I wanted her makeup look to me more classy and soft (and I didn't think yellow would work well for this) so I went for golds and bronzes instead! 


 I wanted Belle's makeup look to be relatively simple and definitely wearable. I applied the eyeshadows lightly but you could apply more liberally for a more dramatic, smouldering look. 

Belle has flawless skin (... like all Disney Princesses really) so I focused on getting a really nice base while still looking radiant and healthy, and also gave her a deep purple blush. 


The eye look is so easy but absolutely beautiful, I drew inspiration from her ball gown for the eyes and wanted it to be soft, delicate and golden. The lips are red like the rose in the west wing, but as I mentioned earlier, I focused on getting this look very soft so I made sure the red wasn't too deep or bright. This lip is perfect for those wanting to try bright coloured lips because it is so wearable. 


Products used: 


Base: Benefit Porefessional Primer
Wilko's Kiss Mattifying Primer 
Bourjois Healthy Mix Serum
Maybelline Blush in Flash Plum (!)
Bourjois Highlighter
NYC Cheek Glow in Peach Glow (!)
and for eyebrows I used Collections Brown Eyeliner cuz, dang, her eyebrows are dark! 


Eyes: Elf Golden Eyeshadow (!)
Elf Caffeinated Eyeshadow (!)
Essence All About Nude Palette (!)
The Balm Meet Matt(e) Nude Palette (!)
Rimmel London Nude Eyeliner 
Collections Brown Eyeliner 
Maybelline Sensational Lash Mascara (!)

Lips: Revlon Colorstay Lipstick in Finale (!)
Elf Minty Lipgloss in Foxy (I think, the name rubbed off!) 


I know that this look is very minimal and looking at it, you don't really think Belle but it's a natural, wearable homage to the princess. 

Next up: 

Rapunzel 

This girl is also my favourite Disney Princess, I absolutely love her and Tangled is my top Disney film so I was very excited to create this look! 


 Grrrr, one day I will be able to show you guys just how beautiful makeup looks, this was so beautiful in real life so it's a real shame that I'm terrible at photography!

I love the colour of Rapunzel's dress so I really wanted to capture that in this look, the other feature I wanted to adapt for this makeup look was the sun from Corona's flag, this can be seen in the lower lashes! 

I did a little half n' half deal with this look, my base makeup mimics Rapunzel's actual face whereas the eyes and lips are inspired by aspects of the film. 
Therefore, I added little freckles because I'm in love with Rapunzel's, if you want to fake freckles, just get an eyebrow pencil and dot around your nose and upper cheeks (or wherever really, but freckles usually show up in the centre of the face).


Products used: 


Base: Wilko's Kiss Radiance Balm 
Maybelline Baby Skin Instant Pore Eraser Primer (!)
Maybelline Fit Me Foundation 
Rimmel London Stay Blushed! Blush in Pop of Pink (!)
Elf Blush in Rose 
Makeup Revolution Highlighter in Peach Lights (!)
Bourjois Maxi Delight Bronzer
and for eyebrows I used a bit of Maybelline Brow Satin (!)

Eyes: Maybelline Color Tattoo in Pink Gold (!)
Geek Chic Cosmetics eyeshadow in As You Wish (!)
Revlon eyeshadow in Plum 
MUA eyeshadow in Lilac
MUA eyeshadow in Copper
MUA eyeshadow in Bronze (!)
Elf Glitter Eyeliner in Pink
Maybelline Sensational Lash Mascara (!)
Collection Liquid Eyeliner in Solar Ray (!)

Lips: Elf Matte Pale Pink Lip Colour (!)
L.A Colors Purple Lipstick  


I love this look, it really complimented the green in my eyes so definitely give this purple halo eyeshadow look a go if you got them emerald, foresty eyes going on (but of course, this would look beautiful on all you guys!)

Third on the list is:

Tiana
Eeekk, Tiana is a brilliant princess and the protagonist of a fantastic film, seriously go watch Princess and the Frog right now if you haven't seen it yet! Also, green is my favourite colour so this was super fun! 


Again, I am eternally frustrated at how not amazing this look on camera but jeez, if you give this a go on your own face, you'll get the full effect!! 

Although it's super hard to see hear in these pictures, the eyeshadow look is kind of like a halo effect but where I focused a super pale yellow in the centre of my lid and blended the green from the outer corners, in, making the colour darker as it gets further away from the centre of my lid. This creates an amazing effect where it looks like the eyeshadow is just a super shiny green, the best example I can think of is ahitsrosa's look over on YouTube  . Just imagine that in green and that's what this looks like in person. It's such a fun look and I would totally recommend you give it a go, its just a lot of blending but it looks so cool! 

I took inspiration from Tiana's human wedding dress because, well, it's just downright amazing isn't it! 


Products used: 


Base: Benefit Porefessional Primer 
Rimmel London Stay Matte Primer
Garnier BB Cream
Collection Speedy Blush in Pinch Me(!)
Maybelline Master Sculpt Highligher
NYC Cheek Glow in Peach Glow(!) 
and for eyebrows Elf Eyebrow Kit 
Maybelline Brow Drama 


Eyes: Elf Matte Eyeshadow in Mint Green 
Sleek i-divine pallete the two greens in this here palette
Elf Green Shadow Stick in Moss Green (!)
Xplode eyeshadow in green 
Geek Chic Cosmetics eyeshadow in Lady of the Golden Wood (!)
Rimmel London Eyeliner in Emerald Green
Maybelline Sensational Lash Mascara(!)
Loreal Paris Manga Punky Mascara in Green (!)


Lips: Soap and Glory Sexy Mother Pucker Lipstick in Perfect Days (!)
Rimmel London Oh My Gloss in Snog (!) 


If you like a really simple natural base, the products I used are perfect for that! 


I'm still not very happy with how the pictures came out so I'm really sorry about that, but wow, the products I used for this look are wonderful and the lipstick is wonderful! 


Finally we got ourselves:

Ariel

Ahhhh, wow, this look is not very wearable if you're shy with your makeup, I'll say that for sure. But yes! I love this makeup so much, I wouldn't wear it out (that's totally up to you and your personal comfort zones).


Wowee! Do you not just look at this an think Ariel, because I do... maybe that's because I created it?
Either way, this is stunning and so unique and I had so much fun playing with colour. 

Yes, I put red in my eyebrows, you should try it some time, just fill in your eyebrows like usual and then lightly brush in any eyeshadow you like until you get the desired amount of colour. I used a brown based red for this so that it looked more 'natural...?' 

The purple and green worked really well together and I should've gotten a close up of the eyes because the wing ... or fin? was detailed and wicked! I used some white eyeliner on the bottom edge of the wing to add dimension. 

Also, coloured eyelashes again! I loved playing with different coloured mascaras and what-not of this post!


Products used: 


Base: Bourjois Happy Light Illuminating Primer
Rimmel London Wake Me Up Foundation (More on this in a review next month!) 
Collection Speedy Blush in Tickled Pink (!)
Makeup Revolution Highlighter in Pink Lights (!)
Maybelline Master Sculpt contouring powder (!)
and for the eyebrows 
Maybelline Brow Stain and 
Geek Chic Cosmetics eyeshadow in Very Specific Skill Set (!)

Eyes: Makeup geek Pigment in Insomnia (!!!)
MUA eyeshadow in Lilac
MUA eyeshadow in  Electric Purple 
Makeup Revolution eyeshadow in Temptress (!)
Elf Green Shadow Stick in Moss Green (!)
L.A Colors Jumbo Eye Pencil in White
Barry M Kohl Pencil in Black 
Loreal Paris Miss Manga Punky in Green (!) 

Lips: Avon Ultra Colour Lip Tint in Raspberry 

This looks calls for some major packing and blending so be prepared to spend a good long time getting all that eyeshadow looking flawless!


Well, I've already said that I love this look and I honestly wish I could've gone more dramatic with them all but I really wanted to give you looks you could wear in your day to day life, secretly knowing that you're Tiana or Belle, y'know. 

In this post, I noted my most favourite products using (!) but I just wanted to say that even if a product doesn't have it, they're still amazing (minus the Xplode green eyeshadow, seriously don't bother with this it has so little pigment) but the MUA eyeshadows for example, I don't think I pointed these out but I absolutely adore these eyeshadows, it is my goal to own them all because they're only £1 each and they're surprisingly good quality and the colours are gorgeous! 

Well, that's it then, the first post in the Inspired By series. I hope to do so many more like Avengers, Harry Potter, My Little Pony, anything like that so if you have any you'd like to see (hopefully the quality of the looks and photographs will be better) then just comment below!!! 

Thanks for reading, have a good week and I shall see you next Wednesday with my August favourites!!! Make sure to follow me on Bloglovin' so you don't miss any of my posts! 

Sunday, 9 August 2015

Summer Beauty Must-Haves


For me, there are 7 Beauty Must-Haves for the Summer, all of which are perfect for transforming your look from everyday to summer day! Through this post, I will tell you my seven secrets to achieving the ultimate (and super easy!) summer look and letting you know the products I have fallen in love with this summer. The heat is really rising in the UK right now, so I felt the need to bring the summer back with this must-haves post, before those long nights start to draw in (should I be excited about autumn this early?) 


1. So, when I think summer, I think getting a tan... well, for those people who actually leave the house, that is. I love how I look with tanned skin but I also love staying indoors because the heat is my enemy, the only option I have is to self-tan and after years of being tempted, I finally tried it! I bought Avon's Sun + Magic Tan, a self-tanning mousse with a light, tropical fragrance. 


I love that it's a mousse, it makes the application so quick and easy, I simply stood in the shower and rubbed this product wherever I wanted to look tanned and then let it dry (it doesn't really need showering off, but I found applying it in the afternoon and then showering the next morning worked well). I can't say one bad thing about it, it smells so nice, it's quick to apply, it bronzes the skin visibly but naturally, and it lasts a good week before fading.   

2. The second thing I think of when summer is on it's way is fruit. Fruit salads, fruit fragrances and, fruit smoothies are three things I love most in the summer. Therefore, this I Love... Mango and Papaya Moisturising Body Lotion I found on the Superdrug website was in my basket as soon as I laid eyes on it. 


This lotion is super smooth and moisturising and smells like a fruit heaven, it's perfect to lay over my newly tanned skin to help bring moisture back and to make my skin smell like summer all day. It claims to moisture, leave your skin silky and smooth and to give you a beautiful fragrance and I cannot agree more (plus how cute is the packaging!). If you're looking for a body lotion for summer, you should definitely try out this personal favourite! 

3. Now onto makeup! I'm going to start from the base, I truly think primers and makeup bases hold the most power in changing and boosting your look. I really got into highlighting and looking luminous this year and the product that helps me achieve that summer glow is the Bourjois Happy Light Luminous Serum Primer.


This pink serum applies thinly and smoothly to add a beautiful and natural glow to your skin, some primers add way too much light for me, to the point where you go from glowing to oily. This primer is perfect, it gives your face more light but in a way that looks healthy, rather than greasy or glittery. If you have oily skin and try to stray away from this kind of product, Bourjois also have a Matte Serum Primer which I haven't tried but I imagine would be great! 

4. What goes hand in hand with glowy skin? Bronzed skin! And that's exactly what I focused on for number 4 of my Summer Must-Haves. Bronzers have slowly made their way into my everyday makeup but for summer, I feel the need to amp this up for that super sun-kissed look. Two products I use on an almost daily basis are the Maybelline Dream Bronze BB Cream and the Bourjois Bronzing Powder and Highlighter.


The BB Cream can be used alone as a BB Cream, under foundation to add a bronzed glow from within or over foundation as a cream bronzer. I recommend the latter as it can be way too dark for lighter skin tones and can become too cakey and thick for summer makeup.
The Bourjois powder duo is a little magnetic booklet with bronzer and highlight in. I use the bronzer to set the BB Cream and brush the highlighter over my cheekbones and cupid's bow. Both powders have tiny gold shimmers in them, they are hardly noticeable but I know that this can put a lot of people off. 

5. In the summer, I love having really bright and light blush, I just think it works  so well with all the bright colours that surround summer. I chose the Bourjois Blush in Healthy Mix, the Rimmel London Stay Blushed! Blush in Pop Of Pink and Collections' Speedy Blush in Cheeky.


As you can see, all of these blushes are beautifully bright and eye-catching pinks. The Bourjois blush has a really nice orange tone to it and colour-wise, it is my favourite of the three. 
I prefer to wear liquid and cream products in summer, it gives the whole face a more natural, glowing finish that looks beautiful in the sun, that's why the second two blushes are my overall favourites. The Collection Speedy Blush and the Rimmel London Stay Blushed! Blush hold very similar and desirable qualities, they both blend into the skin for that naturally blushed look and they are both gorgeous colours! 

6. For my sixth Summer Must-Have, I have strayed from the generic and gone for the more experimental. I think for a lot of people, this isn't a must-have but I think summer is a time to try new things, wear more colour and go out of your comfort zone. That's why I have picked out coloured mascara, this is a new thing for me (excluding the gold and silver mascara I got from a kids magazine way back when) and I am head over heals for it! 


Loreal Paris have recently added two coloured variations to their Miss Manga Mega Volume Mascara line: green and indigo, and wow, I am loving them! They are both bright but opaque so they coat your lashes wonderfully with a pop of electric colour! My tip is to just try wearing the colour on your lower lashes with black mascara on your top lashes: one, this helps get you comfortable with the colour, and two, this looks super cool. 

7. Wow, we already reached the final must-have product for summer!? I had a hard time narrowing this down, I knew I wanted it to be something for the lips, but would I go bright lipsticks? Liquid lipsticks? Lipgloss? Nope, I went with lip balm! But not the colourless kind (although you should really get a lip balm with SPF in it for summer, lips are really sensitive!). I chose Rimmel London's Colour Rush Intense Colour Lip Balm in Make Me Blush, Sunkissed and Rumour Has It (oohoohooh). 


How pretty are these right? What I love about these, and what I think makes these so fundamental for the summer, is that not only do they offer beautiful summer colour but they're balms, so they're gonna keep your lips nice and moisturised in the blistering heat. They have a wide range of colours in this line and I would definitely go check them out! 

And we're done. Now you're all clued up on the wicked beauty products that are perfect for the summer, thanks for reading and, while the suns still here, it would be great to know what your suggestions are!

Saturday, 8 August 2015

Shaving your hair!


I shaved some of my hair off 6 months ago and now I want to share my 'expertise' on the subject for any of you who are thinking about shaving your own hair. This post will highlight the pros and cons of shaving your hair and then maintaining it so you have some idea of what's going to happen before you take on such a big hairstyle change. 

Disclaimer!
I would firstly like to state that I never went to the hairdressers, I shave my hair with my hair clippers at home because I'm both too poor and too awkward to go to a hairdressers. I wouldn't advise this (and I'm sure a hairdresser wouldn't either), but as long as you know what you're doing and you're ready to accept a horrible hair mis-hap, if one was to happen, I would say it is definitely possible to create this hairstyle on your own.

Thinking About It
I spent months wondering whether I should shave the side of my hair off. It started when I pinned a portion of my hair back tightly for a 40's inspired hairstyle; people commented saying that it looked nice and I should shave it off. After that, inception occurred, and I couldn't stop thinking about it! 
I pinned my hair in that way all the time and it took a year for me to finally take the leap of faith. 

Actually Doing It 
After pondering on this subject for a good long while, I finally did it. I got my mum to help me (I would definitely get help if you're doing this at home), and I carefully selected the hair that I wanted to shave off. I firstly moved my parting over more so that when it came to growing my patch out, I could flip some hair over from the other side to cover it up. When I was comfortable with my new parting, I started taking 1cm lines of hair from my parting line to where my hair meets my ear to see how far back I wanted the patch to be. 
For reference, if I press my ear to my head, my patch stops at the tip of my ear. 

I tied the rest of my hair back to the other side of my head so it was out of the way, and then used a pair of scissors to cut the selected patch of hair about half an inch long. For someone who has always had long hair, lobbing off that much hair was certainly an experience and it actually shocked me because, obviously, at this point, there was no going back. 
It was time to get the clippers out. With my long hair still tied up, out of the way, I shaved off the patch of short hair. It is completely up to you, how long you want this hair to be, unless your clippers have a set length (I shaved mine using a size 3 to begin with and then went down to 2, which is just under 1cm long).

My mum checked the line of hair to make sure it was straight and then I used scissors to clean up the hair around my ear. If you're not used to having super short hair then I would prepare yourself for a shock because, for me, it was so weird seeing my hair that short. However, I would definitely say that I didn't regret it at all! 

Maintaining It 
The worst part of having shaven hair is having to maintain it. I will usually shave it every fortnight and cut the hair that grows over my ear every week, or whenever I notice it growing too much. I am a notoriously lazy person and instead of spending one minute shaving my patch I will just let it grow out. Don't do this!!! When your hair gets to a certain length, it will start sticking out weirdly and this (for me at least) is not a desirable look. So keep on top of it! I like my patch at around 1cm long, it's long enough that the colour in that area is the same as the rest of my hair but not too long that it does said sticky out thing. 

One thing I would say is, please be super careful when shaving. I almost always catch bits of long hair and then end up with stray hairs that are about 2 inches longer than my patch hair and 5 inches shorter than my long hair. This is why I suggested going to the hairdressers to get it shaved because I doubt they would do this too. Of course, hairdressers can get expensive and not everyone has that kind of money. 

Relating to the previous two comments, please, please, please don't use scissors to cut your patch once is starts growing too long!!!!  
Here's a little anecdote for you: a couple of months ago, I realised I had let my hair grow out way too much when I was getting ready for college (remember what I said about keeping on top of your patch a couple paragraphs ago, yeah, that comes from personal experience). As if it wasn't bad enough, I didn't have any clippers at my house so I decided using scissors to cut down the hair would be a great idea. It really, really wasn't. I ended up creating an uneven, chopped up mess on my patch and I can't describe just how bad it looked. It was bad. It was so bad.
I'm the kind of person who doesn't want to be affected by other's opinions but I totally am. So, I couldn't go to college like this. At this point, my clippers were still at my dads, who lived 20 minutes away from my house and 25 minutes away from my college. It was my only option if I wanted to go to college that day. So I called in to say I would be late, took the 45 minute round trip, and turned up to college an hour late but at least it was with neatly cut hair. 

Living With It
From personal experience, patches suits short hair, long hair, curly hair, straight hair, loose hair, ponytails and buns, from personal observation, patches suit anyone, of any age, race, hair colour etc. Seriously, this has to be one of the most versatile hairstyles I have seen and I adore it. So, if you're worried it might not suit you, the chances are, it will. As I said before, pinning your hair back is a great way to test what it would look like on you! 


Growing It Out 
I haven't grown my hair out yet so I can't really tell you how that goes but I just wanted to take a moment to point out that the chances are, you're going to want to grow it out at some point in the future. This means waiting months and years, for your hair to go through every step of growth (yes, even the horrible sticky out step I have warned you about). Please consider this before you go ahead with the scissors. I am way too scared to go through this process at the moment, luckily, I love my hair and I'm happy to keep it this way so I know I don't have to face growing it for a while. 

So, that's all I can really say about shaving your hair, I encourage anyone to go ahead and do what they like with their hair. I just think, at the end of the day, it's only hair, it grows back, it doesn't define you so why not, y'know? If you have any questions, feel free to comment and good luck on your hair-ventures!